Last updated: 28/07/2026
User Help Guides
Data Analyzer

Summary
Data Analyzer is an addon created by Eureka Business Solutions that allows you to analyze sales, purchasing and stock data, drill into transactions and identify trends with year-to-year comparison. It will be run from the Summaries section of the Sage 200 menu.
The program
When opening Data Analyzer a new window (the screen below) opens.
Pre-saved views can be selected and opened using ‘Views Filter’
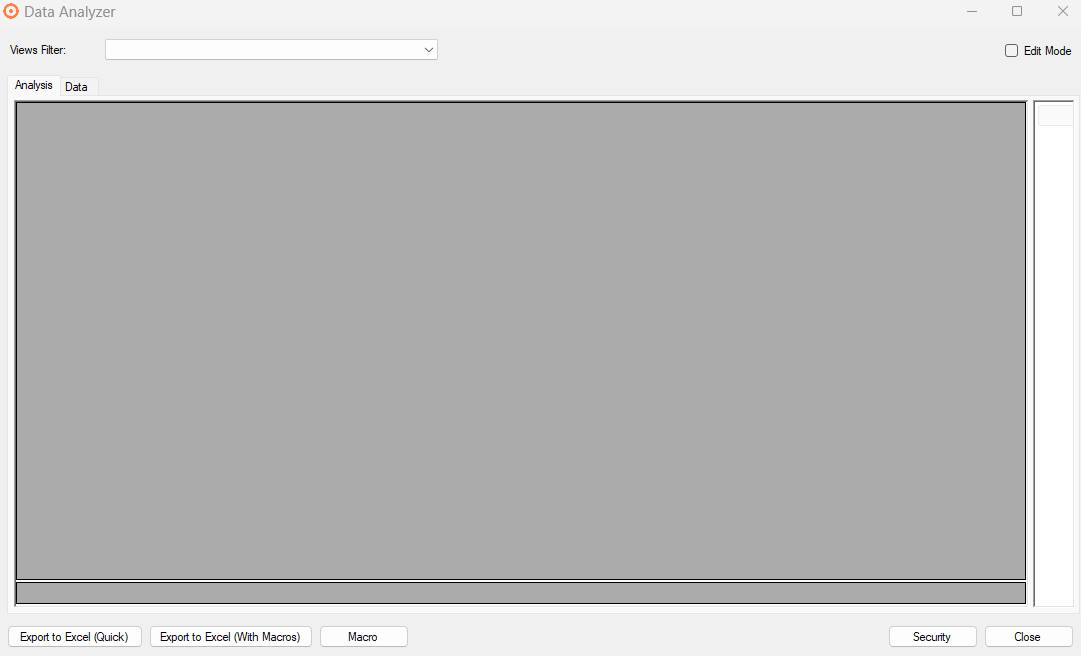
If there are no previously saved views, check the ‘Edit Mode’ box and select an ‘Analysis Module’ to start selecting your data to analyze.
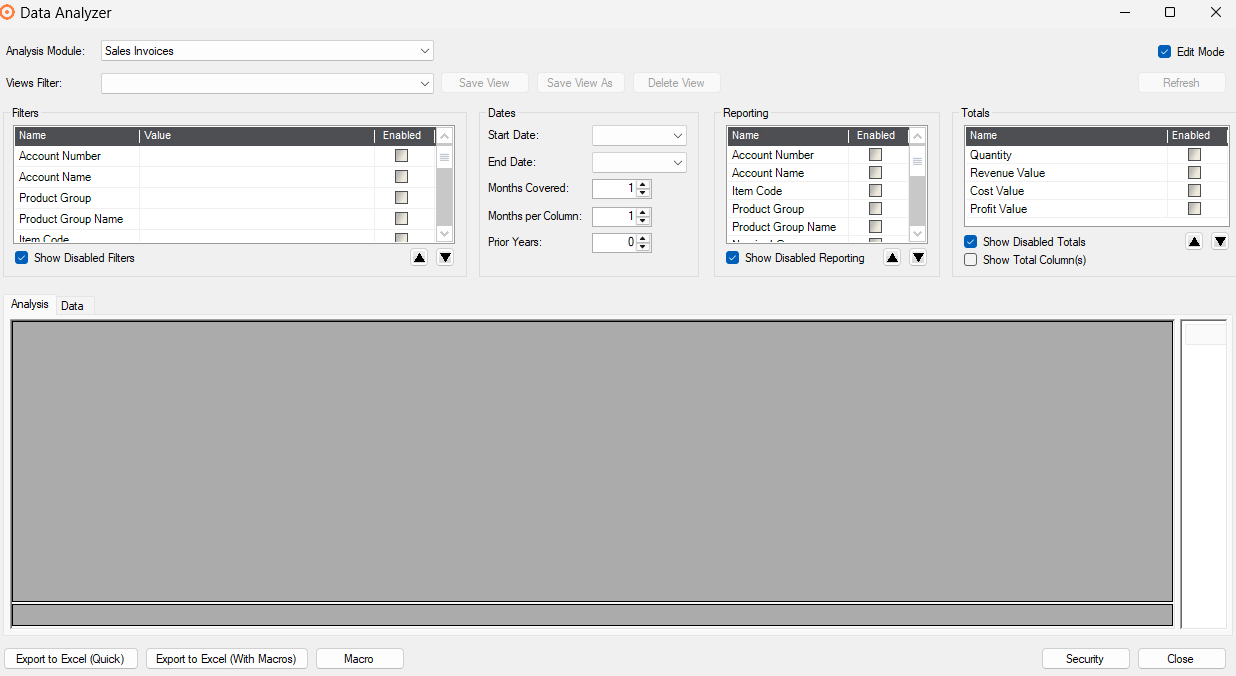
Selecting Data
The ‘Analysis Module’ is used to choose which module you would like to pull data from, this may be sales invoices, sales orders etc. Modules can be designed to suit each customer, and additional columns can be added to ‘Reporting’ and ‘Totals’, discuss with us if this is required.

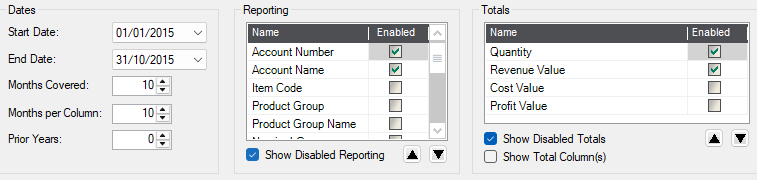
It is important to note that data must be selected within the ‘Dates’ (if visible), ‘Reporting’ and ‘Totals’ sections for the ‘Refresh’ button to become available for use.
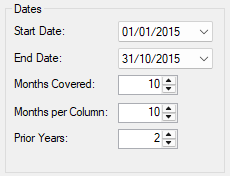
Dates
The ‘Dates’ section allows filtering of the data by several different criteria. ‘Start Date’ and ‘End Date’ needs to be set so data can be displayed between 2 dates, this will populate ‘Months Covered’.
‘Months per Column’ determines how many columns the data will be spread across, if 12 was selected here each column would represent 12 months of data.
‘Prior Years’ will determine how many previous years data will be displayed under the ‘Analysis’ tab; the maximum number of prior years is 2.
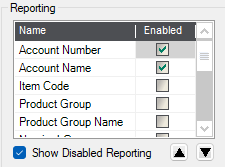
Reporting
The ‘Reporting’ section is used to select what data fields will appear under the ‘Analysis’ tab. Each box checked will display as its own column.
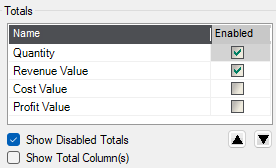
Totals
Under the ‘Totals’ section, total values that will be displayed under the ‘Analysis’ tab can be chosen here. The number of columns these values will be displayed in is dependent on what settings have been selected for ‘Months per Column’ and ‘Prior Years’ under the ‘Dates’ section.
Views
The ‘Views Filter’ dropdown is where previously saved views will be found.


‘Save View As’ will save any chosen settings and create a new view with them, this can be named as desired and will then appear in the ‘Views Filter’ drop down. Both save features provide the option to save as public for other users to view.
There is an option to save or delete any selected views. If ‘Save View’ is selected this will save the current view you are working on.
Filters
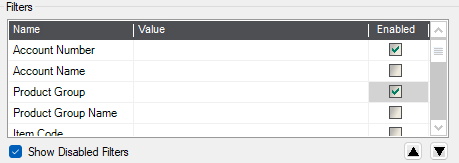
The ‘Filters’ section is another way to select the data to view but we recommend using this feature as discussed further in ‘The Data’ section below.
The Data
Once all the settings are as required the ‘Refresh’ button will display the data in the bottom pane on the ‘Analysis’ tab.
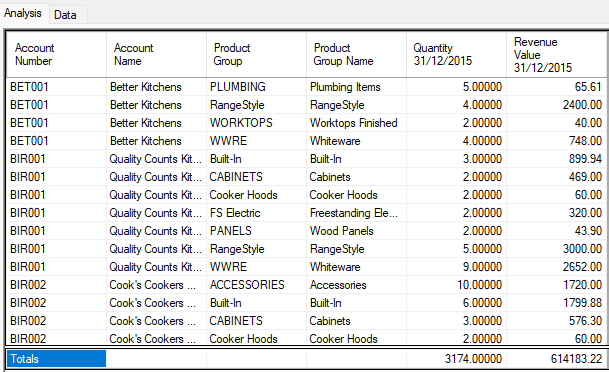
Double clicking in specific fields will drill interrogate the specifics i.e. in the images below - double clicking in the Account Number ‘BIR001’ returns the data for that account only.
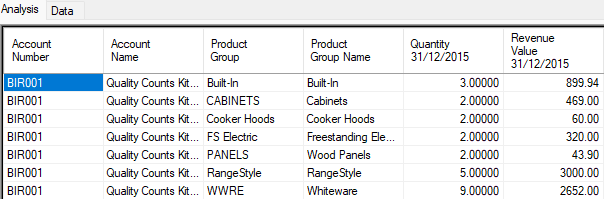

This can then be taken further to look at specific Products Groups or Names and so forth, for that specific account.
From here the ‘Data’ tab can be selected to reveal the information below.
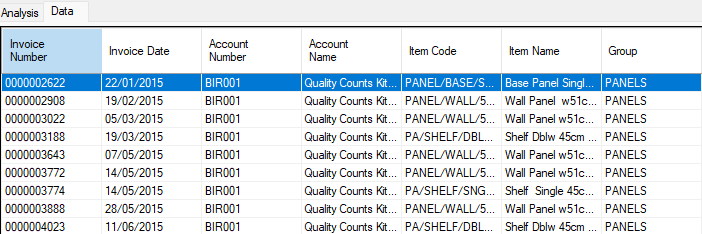
The ‘Data’ tab will display all the un-summarized information based on options selected in the ‘Analysis Module’ dropdown and the ‘Analysis’ tab. As in Sage 200, data can be sorted by clicking the column headers.
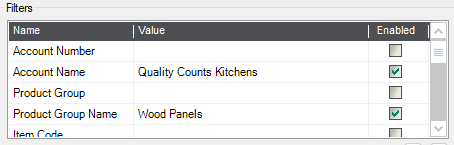
The selected data fields also populate the ‘Filters’ table. This table can be ignored, or it can be used to amend/specify data fields by unchecking or changing the value selected from drop-downs then clicking on ‘Refresh’. However, we recommend using the method in the ‘Data’ section above to filter/hone your selection to analyze rather than the ‘Filters’ table.
Export
To export your data to Excel use the ’Export to Excel (Quick)’ button.
Or the ‘Export to Excel (With Macros)’ option allows an Excel macro to be added to the data for when it is exported. The macro entered will save as a part of the Views Filter if saved. ‘Export to Excel (With Macros)’ is an advanced feature and will require training, so talk to us if more information is required.

Security - Administrators
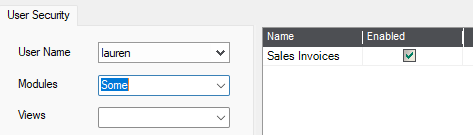
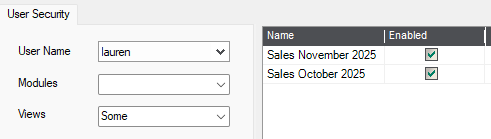
Within ‘Security’ which is located at the bottom right of the screen – available to administrators only, ‘Modules’, ‘Views’ and actions can be specified per User.
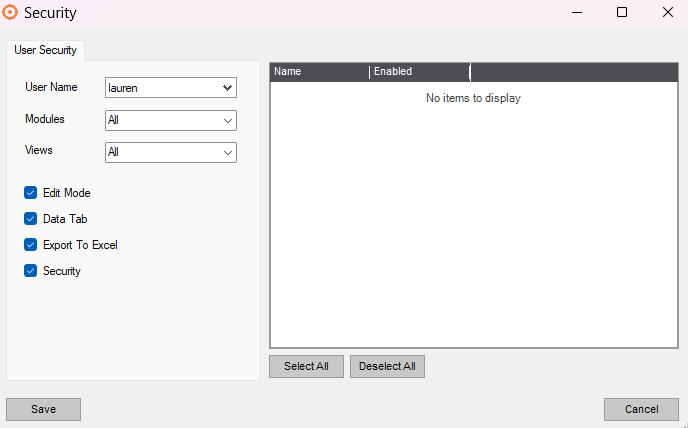
The ‘Modules’ and ‘Views’ boxes can be dropped to select access to ‘Some’ rather than ‘All’, when has been done, modules and views can be dis/enabled for the User by the tick boxes.